 By Lauren Holland
Updated November 2026
A standing desk add on turns your current desk into a sit-stand workspace without buying a new desk. This guide walks you through choosing the right type, checking that it fits your existing setup, and adjusting it so your screen and keyboard sit at a comfortable height. Most of the work takes about 20 minutes. You may also like Standing Desk Frame Only: How to Choose and Assemble One (6 Steps).
Step 1: Decide Which Type of Add On You Need
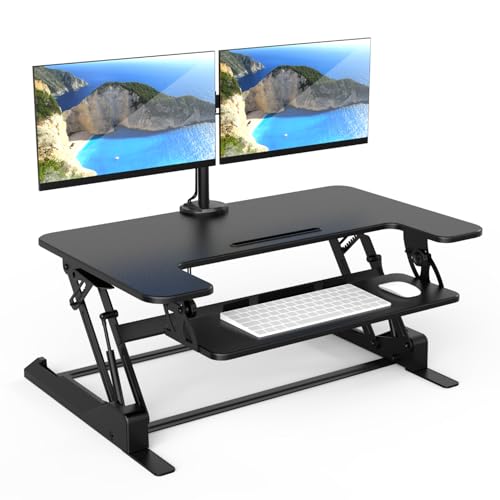
Standing desk add ons come in a few main styles. A desktop riser sits on top of your current desk and lifts the monitor and keyboard together. A keyboard tray lowers the typing surface below the desk so your mouse and keys sit at elbow height while the monitor stays put. Some riser models include a dedicated keyboard shelf, which works well if you want both surfaces on one unit.
Shopping for one? See our guide: 6 Best Standing Desk for Home Office (2026): Expert Picks.
Choose a riser if your monitor sits too low and your keyboard is already close to the right height. Choose a keyboard tray if your keyboard is too high when you stand. If you use two monitors or a laptop plus an external screen, look for a wider platform.
Step 2: Measure Your Desk and Workspace
Before you order, measure the depth and width of your desk surface and the distance from the floor to the underside of the desktop. Many risers are designed for a desk depth of roughly 24 to 30 inches, so a deep desk may need a larger platform. Confirm the riser will not block your keyboard tray, drawers or monitor arm.
Check the weight limit listed by the manufacturer and add up your monitor, laptop, keyboard and any accessories. Stay well under that number. If you have a heavy setup, a sturdier model with a higher listed capacity is the safer choice.
Step 3: Set the Height Correctly
Once installed, stand up straight with your shoulders relaxed. Your elbows should bend at about 90 degrees with your forearms level with the keyboard. The top of your monitor should sit at or just below eye level, roughly an arm’s length away. Adjust the riser or tray until you reach that position while standing, then check it again while seated.
For a deeper walkthrough of fine-tuning, see Standing Desk Height Adjustment: A Step-by-Step Guide for Setting It Right. If you plan to rotate between sitting and standing, Using a Standing Desk: 7 Setup and Habit Steps for Your Workday covers the daily routine.
Step 4: Check Stability and Cable Routing
Give the add on a firm push from the side. It should not wobble, tilt or shift when you type. Make sure the base sits flat on the desk and that nothing hangs over the edge. Run cables with enough slack that they do not pull when you raise or lower the unit. Use clips or a cable tray to keep wires from catching on your feet.
If your desk is an unusual shape, Standing Workstation for Desk: A Step-by-Step Setup Guide offers more layout options.
Step 5: Build a Standing Routine
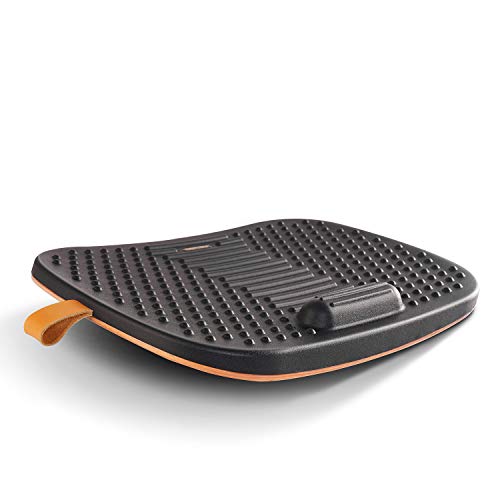
Stand for short stretches at first, perhaps 20 to 30 minutes, then alternate with sitting. Many people find a rhythm of roughly one standing block for every sitting block works well during the first week. Shift your weight, keep one foot slightly forward on a footrest if you have one, and move every so often. Pay attention to any new soreness in your legs or back and adjust your pace if it appears.
Checklist Before You Start
- Desk depth and width measured
- Underside clearance checked
- Total weight of equipment under the listed limit
- Monitor and keyboard heights tested while standing and seated
- Base stable and cables routed safely
Common Mistakes
- Raising the monitor too high, which strains the neck over a full day.
- Leaving the keyboard at desk height while standing, causing shoulder tension.
- Overloading the platform with extra monitors or heavy speakers.
- Standing for hours on the first day instead of building up gradually.
- Ignoring cable slack, which can pull devices off the platform.
Recommended Gear
A desktop riser with a dedicated keyboard shelf suits people who want both surfaces on one unit. View on Amazon
A low-profile keyboard tray is useful when your keyboard is too high but your monitor is already correct. View on Amazon
An anti-fatigue mat helps reduce discomfort in your feet and legs during longer standing periods. View on Amazon
FAQ
Will a standing desk add on fit any desk?
Most fit standard office desks, but you need to check the depth, width and underside clearance against the product specifications. Very deep or unusually shaped desks may need a different type of solution.
How long should I stand each day?
Many people start with short blocks and build up over several weeks. Listen to your body and alternate with sitting rather than standing all day. We also found Matt for Standing Desk: How to Choose and Use One (6 Steps) useful on this point.
Should I consult a professional about posture or pain?
Yes. If you have ongoing back, neck, joint or circulation problems, talk with a doctor or physical therapist before increasing your standing time.
Conclusion
A standing desk add on lets you change positions without replacing your desk. Measure carefully, set the height for both standing and sitting, and build your standing time gradually. With those steps done, your workspace should feel stable and comfortable.
Related reading
- Drawers for Standing Desk: How to Add Storage Without Losing Space
- Yoga at Desk Exercises: 10 Seated and Standing Moves for Work
- U Shaped Standing Desk: How to Choose and Set One Up Right
Ready to choose one?
About Lauren Holland
Lauren Holland is part of our editorial team and reviews and edits our fitness at work guides, checking product details against manufacturer specifications and owner feedback.